AM Step 1 — Initial Cleaning to Inspect
The first step is not a cleaning exercise. It is the first real inspection the equipment has had in years. Everything that follows depends on doing this one well.
The first time a team does AM Step 1 properly, they are always surprised by what they find.
Not because the equipment is in terrible condition, although sometimes it is. Because they had no idea. They had been running the same machine, on the same shift, for months or years, and they had never seen what was underneath the accumulated dirt, product residue, and contamination that had built up over time.
That is not a criticism of the team. Nobody had ever asked them to look. Nobody had ever shown them what to look for. The machine ran, or it didn't, and either way, it was someone else's problem.
AM Step 1 changes that. Not by adding a cleaning task to the shift. By giving the team a reason to get close to their equipment, the knowledge to understand what they are seeing, and a system to do something about it.
The equipment does not fail suddenly. It deteriorates. And the team that runs it every day is in the best position to see that deterioration early, if they know what to look for.
Autonomous Maintenance is built in sequence, step by step, using a structured development process confirmed by audit at each stage. If you are new to the system, the AM Pillar page explains how it works before you begin.
Technical Operator ownership
The goal of Autonomous Maintenance is to develop Technical Operators, people who understand their equipment well enough to maintain its basic conditions, detect early signs of deterioration, and respond correctly when something is not right.
This does not happen all at once. It develops progressively across the seven steps. And it does not mean operators replace the maintenance function. It means the boundary between what operators do and what Maintenance does shifts, deliberately, and in one direction.
At the start of AM Step 1, Maintenance carries most of the load. They respond to failures, carry out planned work, and hold most of the technical knowledge about the equipment. The operating team runs the machine and reports problems.
By the end of the Restoration phase, AM Steps 1 through 3, the operating team is cleaning, inspecting, and beginning to lubricate their equipment to a standard. They are finding and recording abnormalities. They are fixing the ones they can fix. They are escalating the ones they cannot. Maintenance is still involved, but the operating team is no longer passive.
By the end of the Prevention phase, AM Steps 4 and 5, the operating team is managing Centreline standards, conducting autonomous inspections, and owning the daily condition of their equipment. Maintenance is focused on the work that genuinely requires their expertise.
By the end of the Optimisation phase, AM Steps 6 and 7, the operating team is contributing to quality management and early equipment management. The boundary has shifted substantially. Maintenance is a specialist resource, not a first responder.
This progression is not automatic. It is the result of the step-by-step development that begins here, in AM Step 1.
AM Phase 1 — Restoration
Step 1 is the first of three steps in the Restoration phase. The goal of this phase is to bring the equipment back to a known, clean, properly maintained condition, and to put the standards in place to keep it there.
The three steps build on each other in sequence:
- AM Step 1 — Initial Cleaning to Inspect. The team cleans the equipment thoroughly for the first time, exposes hidden abnormalities, and begins to understand what good condition looks like.
- AM Step 2 — Address Sources of Problems. The team addresses the root causes of the problem areas found in Step 1, makes the equipment easier to maintain, and begins to eliminate losses.
- AM Step 3 — Set CIL Standards. The team establishes the Cleaning, Inspection, and Lubrication standards that will maintain the equipment condition going forward. CIL becomes a Hypercare Process, reviewed through the Tiered Accountability Meeting at every tier.
You cannot run AM Step 2 well without having done AM Step 1 properly. You cannot set meaningful CIL standards in AM Step 3 without having addressed the problem areas in AM Step 2. The sequence is the logic.
Working with the Maintenance function
At AM Step 1, the Maintenance function plays a specific role. They provide the equipment history and known failure modes that help the team focus the initial clean on the areas most likely to reveal significant abnormalities. They also receive and prioritise the Defect Tags that are beyond the operating team's capability to fix, the escalated defects that require specialist knowledge, parts, or access. The relationship at this step is straightforward, the operating team finds, the Maintenance function fixes what the team cannot.
Purpose
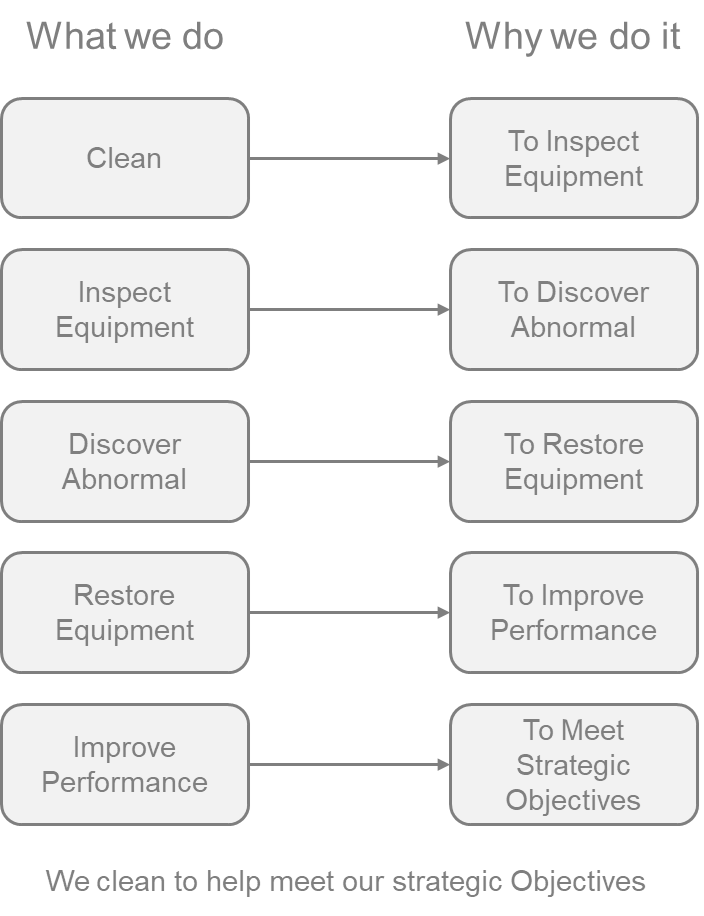
The purpose of AM Step 1 is to restore the equipment or process to its ideal condition, and to begin developing the team's skill to identify abnormal conditions.
Those two things happen together. You cannot separate them. The act of cleaning is the act of inspecting. Every surface the team touches is a surface they are learning to read. Every abnormality they find is a moment of understanding, about what the machine does, what it needs, and what happens when those needs are not met.
This is why AM Step 1 is described as cleaning to inspect, not cleaning for cleanliness. The standard is not a clean machine. The standard is a team that understands their machine.
Objectives
AM Step 1 has two sets of objectives running in parallel. One is about the equipment. The other is about the people. Both matter. Neither is optional.
For the equipment
Expose hidden abnormalities
The initial cleaning removes all the accumulated dirt, debris, and contamination that has built up over time. Once it is gone, the abnormalities that were hidden underneath become visible. Loose bolts. Worn seals. Cracks in guards. Oil leaks that had been masked by grime. The team's reaction at this stage is almost always the same: "I didn't know that was there."
The level of cleanliness must then be maintained. Not as a housekeeping standard, as a detection standard. If the equipment is clean, any new contamination or deterioration is immediately visible. If it is not clean, abnormalities accumulate unseen until they cause a failure.
Restore deterioration
Once the abnormalities are visible, the team addresses them. This means fixing minor flaws, establishing what the basic "good" condition of the machine actually is, removing any items, materials, or parts that are unnecessary, and eliminating any unsafe areas or tasks.
The principle here is: first restore, then improve. The team is not trying to make the equipment better than it was designed to be. They are trying to get it back to the condition it was designed to run in. Improvement comes later, once the baseline is established.
Identify problem areas
Not every abnormality can be fixed immediately. Some require maintenance support. Some require engineering input. Some are structural, they will keep coming back unless the root cause is addressed.
These are the problem areas. They include places that are difficult to operate or keep in ideal condition, areas that get contaminated frequently or that cause issues when contaminated, locations that are hard to see or reach, and equipment or process settings that change often or are difficult to hold to a standard.
Problem areas are recorded, not ignored. They become the focus of AM Step 2.
For our people
Develop teamwork
Every team member engages in the basic activities of inspection by cleaning. Nobody watches while others work. Individuals are given specific roles with clear responsibilities, so the team knows who is responsible for which part of the equipment and who is accountable for what.
This is often the first time the operating team has worked together on the equipment in this way. The shared experience of finding and recording abnormalities builds a different kind of team relationship, one based on shared ownership rather than shared complaint.
Develop skills
AM Step 1 begins to build a deeper understanding of the equipment. Team members develop a common understanding of terminology and purpose. They acquire the basic inspection skills needed for different component types. They begin to develop the ability to distinguish abnormal from normal, to know what the machine is supposed to look, sound, and feel like, and to recognise when something is not right.
The goal is not technical expertise. It is informed awareness. An operator who understands what a gauge is measuring, what the normal range is, and what happens to the product if it goes out of range, is an operator who can act before a failure occurs.
Develop curiosity and build awareness
The most important shift in AM Step 1 is not what the team finds. It is how they start to think.
Before AM Step 1, the equipment is something that runs or doesn't. After AM Step 1, it is something the team understands, at least in part. They begin to see the connection between the condition of the equipment and the performance they get from it. They begin to realise that the "minor" abnormalities they had been ignoring were not minor at all.
The progression looks like this: "I wonder…", the team notices something they had not noticed before. "Let's see if…", they investigate. "That causes this…", they understand the connection. That curiosity, once developed, does not go away.
Measures of success
AM Step 1 uses two types of measures. Baseline measures are established before the step begins. Results measures are tracked as the step progresses.
These three measures must be in place before AM Step 1 begins. They are the starting point against which all progress is measured.
- Output Measure: Number of unplanned stoppages. Establish the current baseline. This is the number AM Step 1, and the whole Restoration phase, is working to reduce.
- Efficiency Measure: Routine cleaning and inspection time. How long does it currently take to clean and inspect the equipment? This baseline will be used to track whether the team is becoming more efficient as they develop skill and as problem areas are addressed.
- In Process Measure: Number of defects identified. Start counting from day one. The number will rise sharply in AM Step 1, that is expected and correct. A rising count means the team is finding what was always there.
Pillar progress measures, track as you go
These measures track the progress of the step and the development of the team.
- Defect backlog trend. The total number of open defect tags. Should be falling, or at least not growing, as the step progresses. A rising backlog that is not being closed is the earliest warning that the system is not keeping up.
- Defects fixed within shift. The percentage of minor defects corrected in the same shift they are found. This should be high from the start. If it is low, the team is either finding defects they cannot fix or not prioritising closure.
- Escalated defects with a named owner and close-out date. The target is 100% before the shift ends. Track the percentage. Anything below 100% means something has been left without an owner.
- Loss improvement topic selected and progressing. Has the team selected a loss area to focus on? Are sub-themes identified? Is the trend moving?
- One improvement per person. Track how many team members have completed at least one improvement. The target is every person, every step.
- One Point Lessons developed and taught. Count of OPLs developed and the number of people trained on each. Both numbers matter, an OPL that has not been taught has not transferred knowledge.
- Operator skill and knowledge level. Tracked against the capability matrix. Observable, not a test score. Can the team member identify abnormal conditions and respond correctly?
By the time the AM Step 1 audit is conducted, the team should be able to demonstrate:
- Equipment is clean and free of accumulated contamination
- All identified abnormalities tagged, recorded, and either corrected or assigned with a named owner and close-out date. 80% closed
- Before-and-after photographic evidence documented and accessible
- Problem areas identified and recorded
- Initial cleaning standards documented and the team trained on them
- Baseline results captured for all process and output measures
- Minor stops reduced by 25% from baseline
- At least one improvement per person completed
- One Point Lessons developed and taught to the team
Systems required before you start
AM Step 1 cannot run without these systems in place. They are not optional extras, they are the infrastructure that makes the step work. If any of them are missing, the team will find abnormalities and not know what to do with them. That is the worst possible outcome: the team learns that finding a problem and doing nothing about it is acceptable.
Hypercare Process: Defect Handling
A Hypercare Process is one that is actively reviewed at every tier of the Tiered Accountability Meeting until it is stable and performing to standard. Defect Handling is the first Hypercare Process introduced in the AM journey. It begins in AM Step 1 and stays on the Tiered Accountability Meeting agenda until the system is working reliably, abnormalities are being found, recorded, escalated, assigned, and closed at the rate the team is generating them.
The process owner is the AM Pillar leader, who is accountable for the system design and its health. The line leader is accountable for daily execution.
The specific measures tracked for Defect Handling, in-process and output, are part of the Measures of success section above.
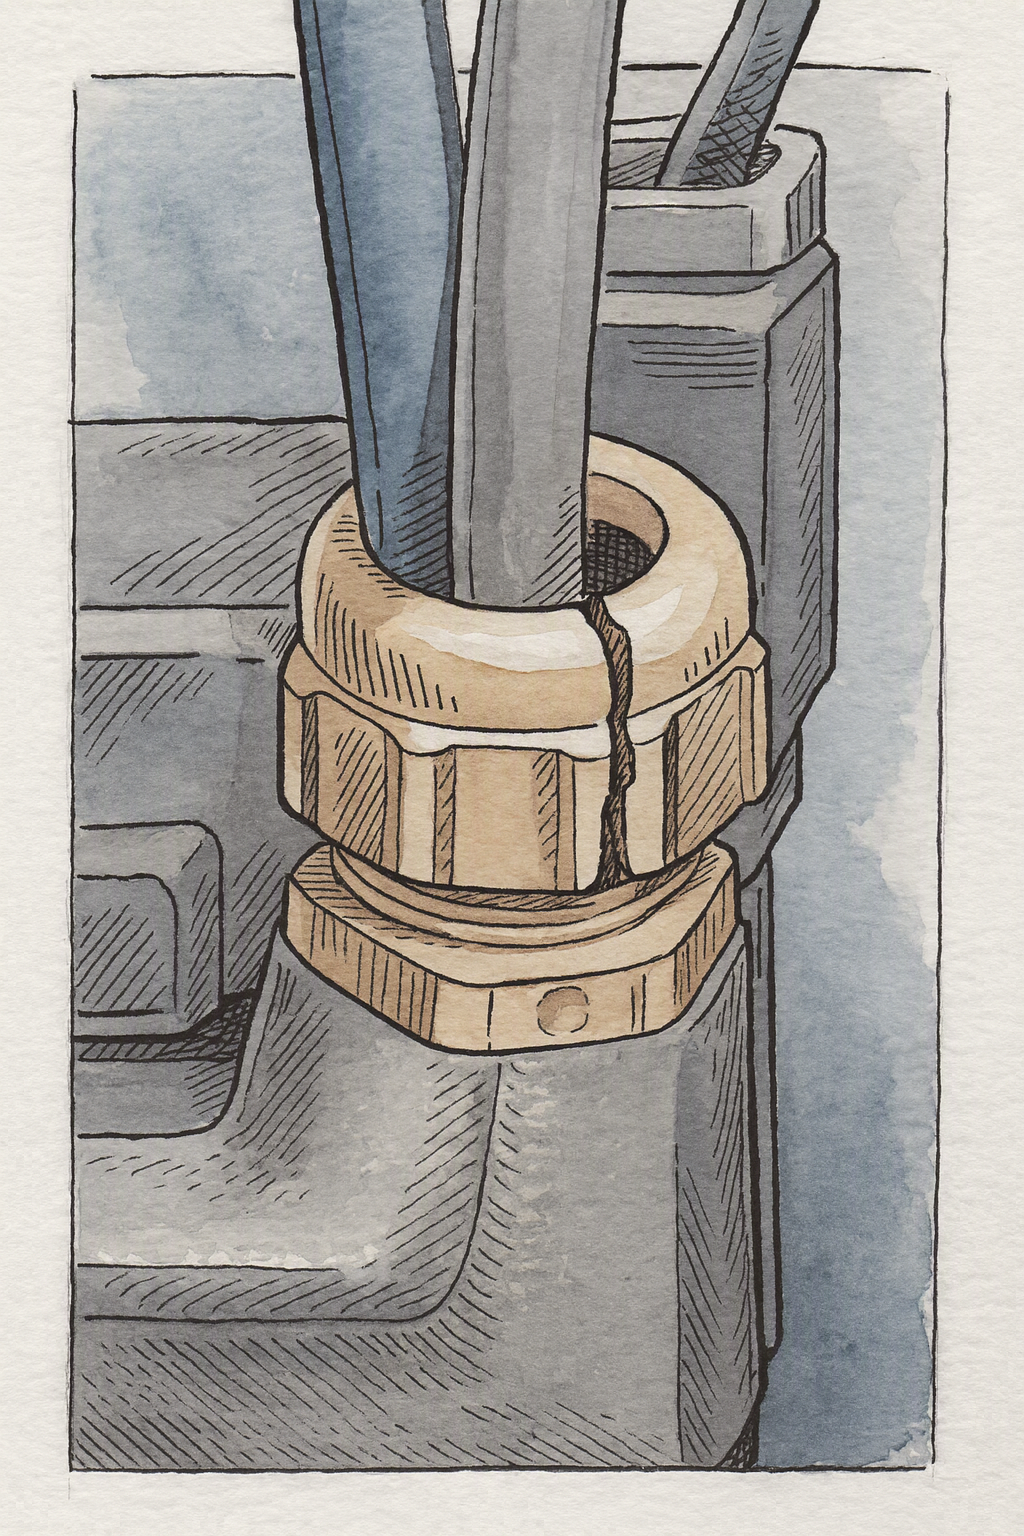
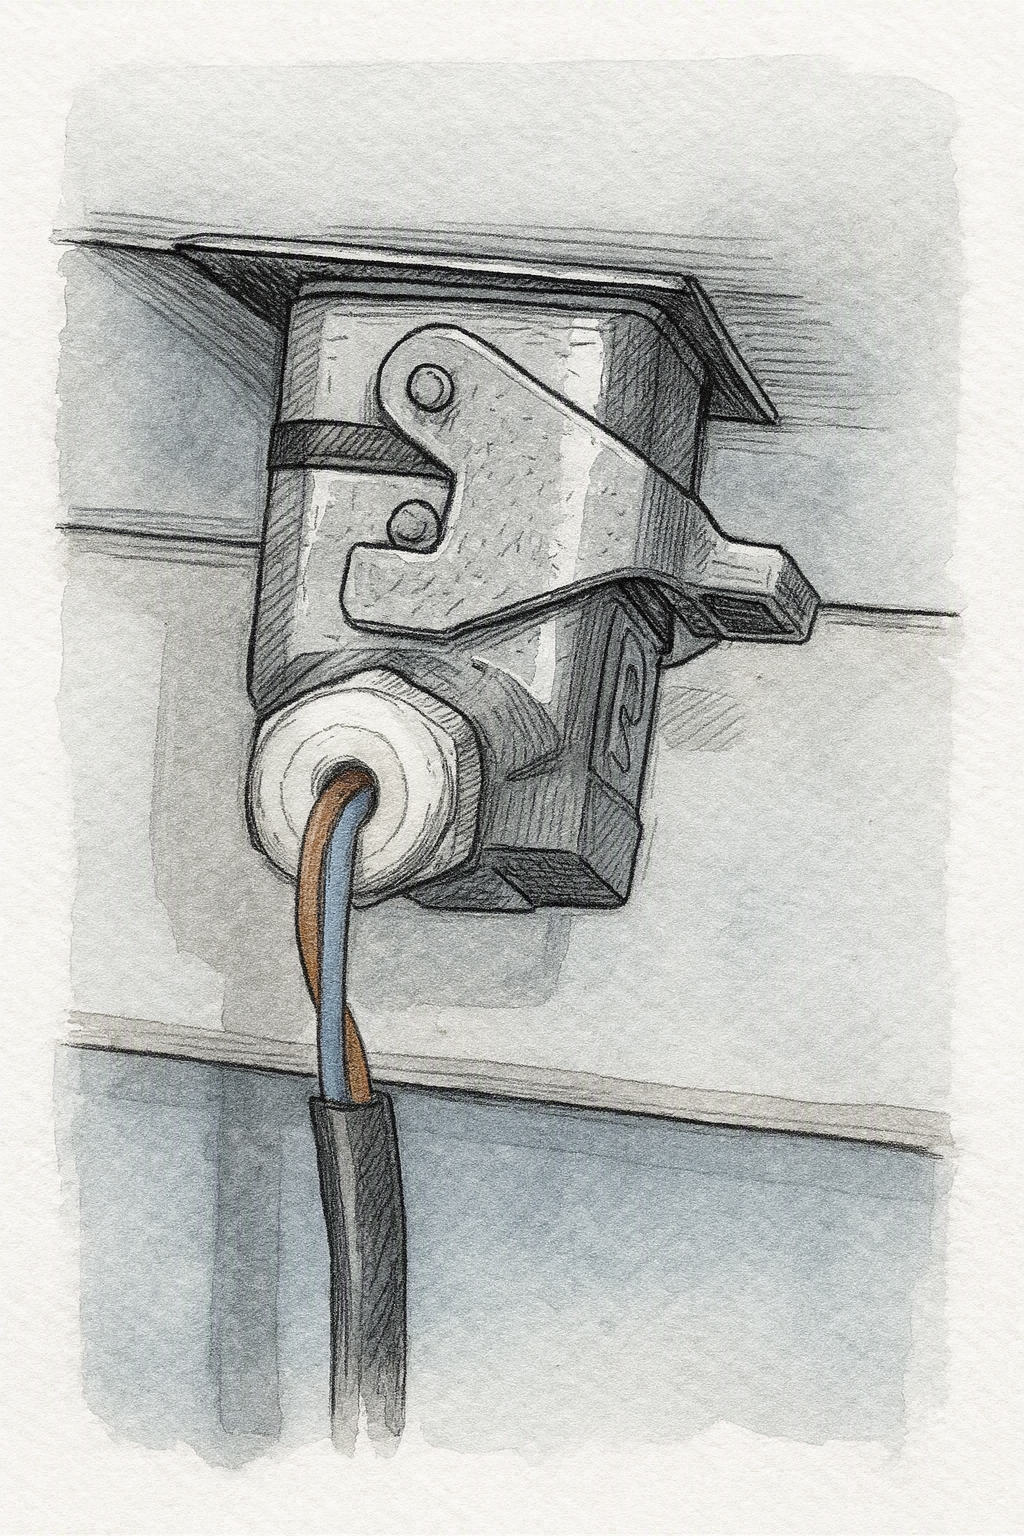
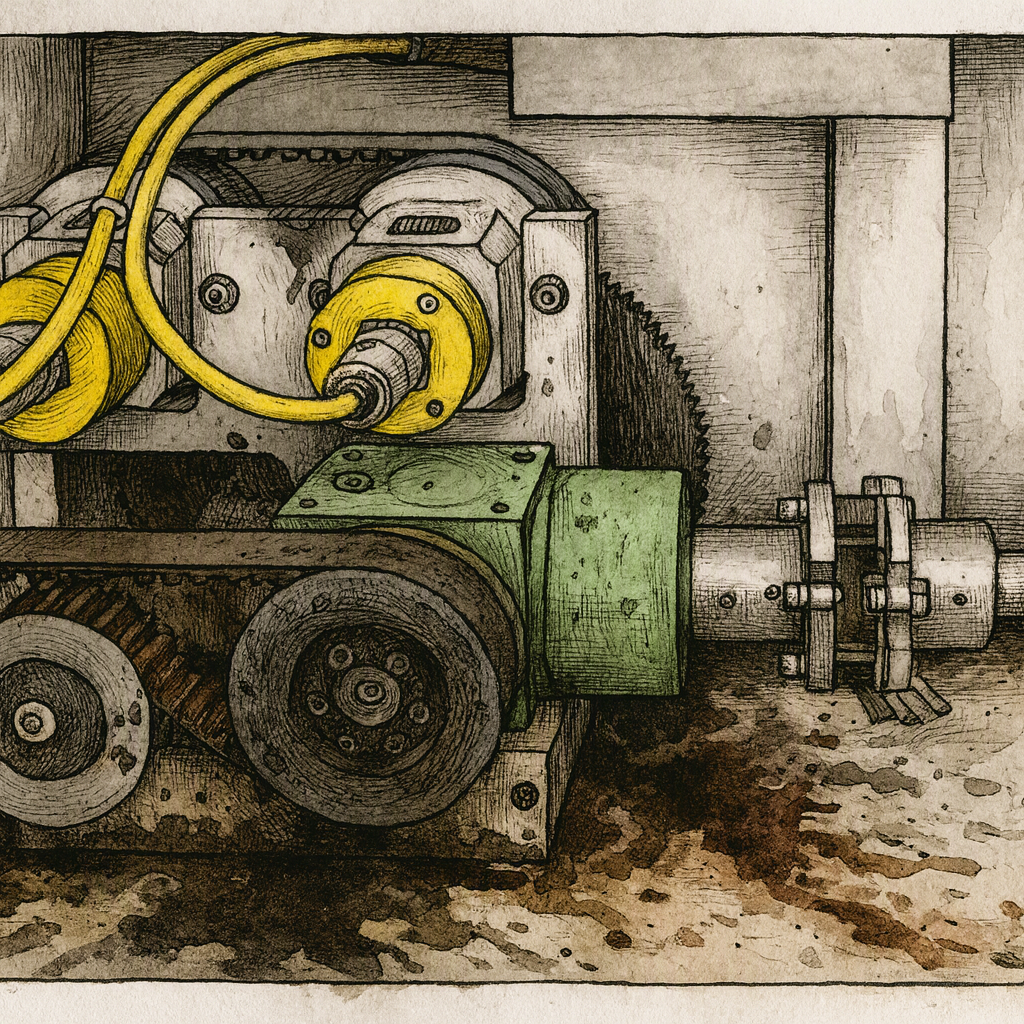
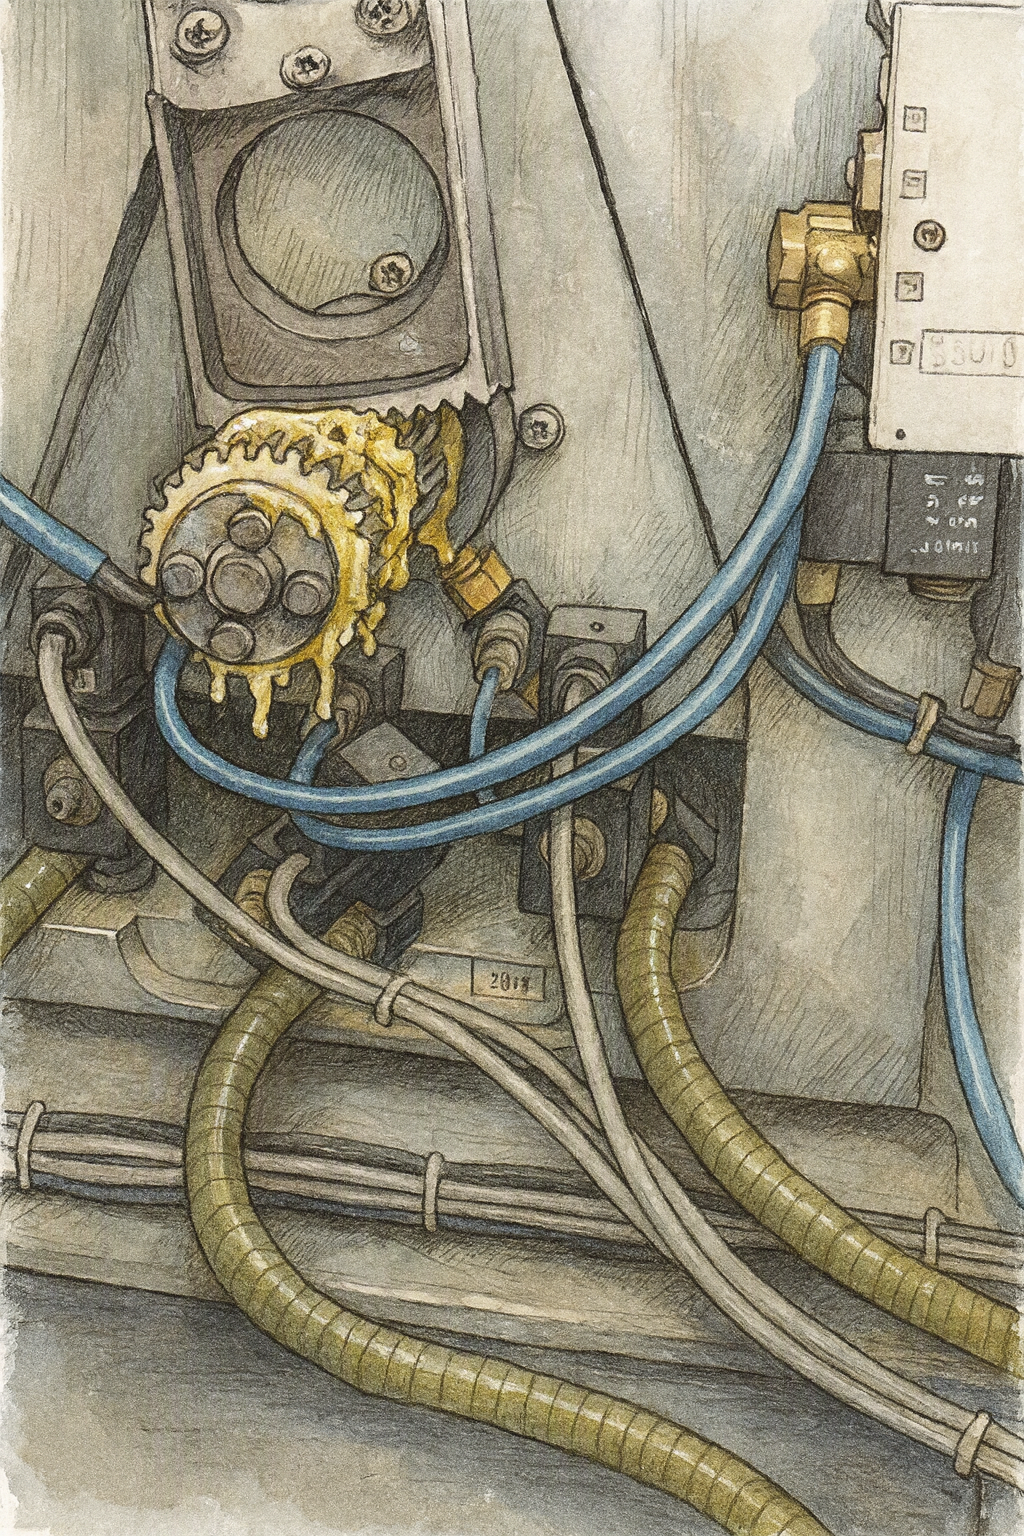
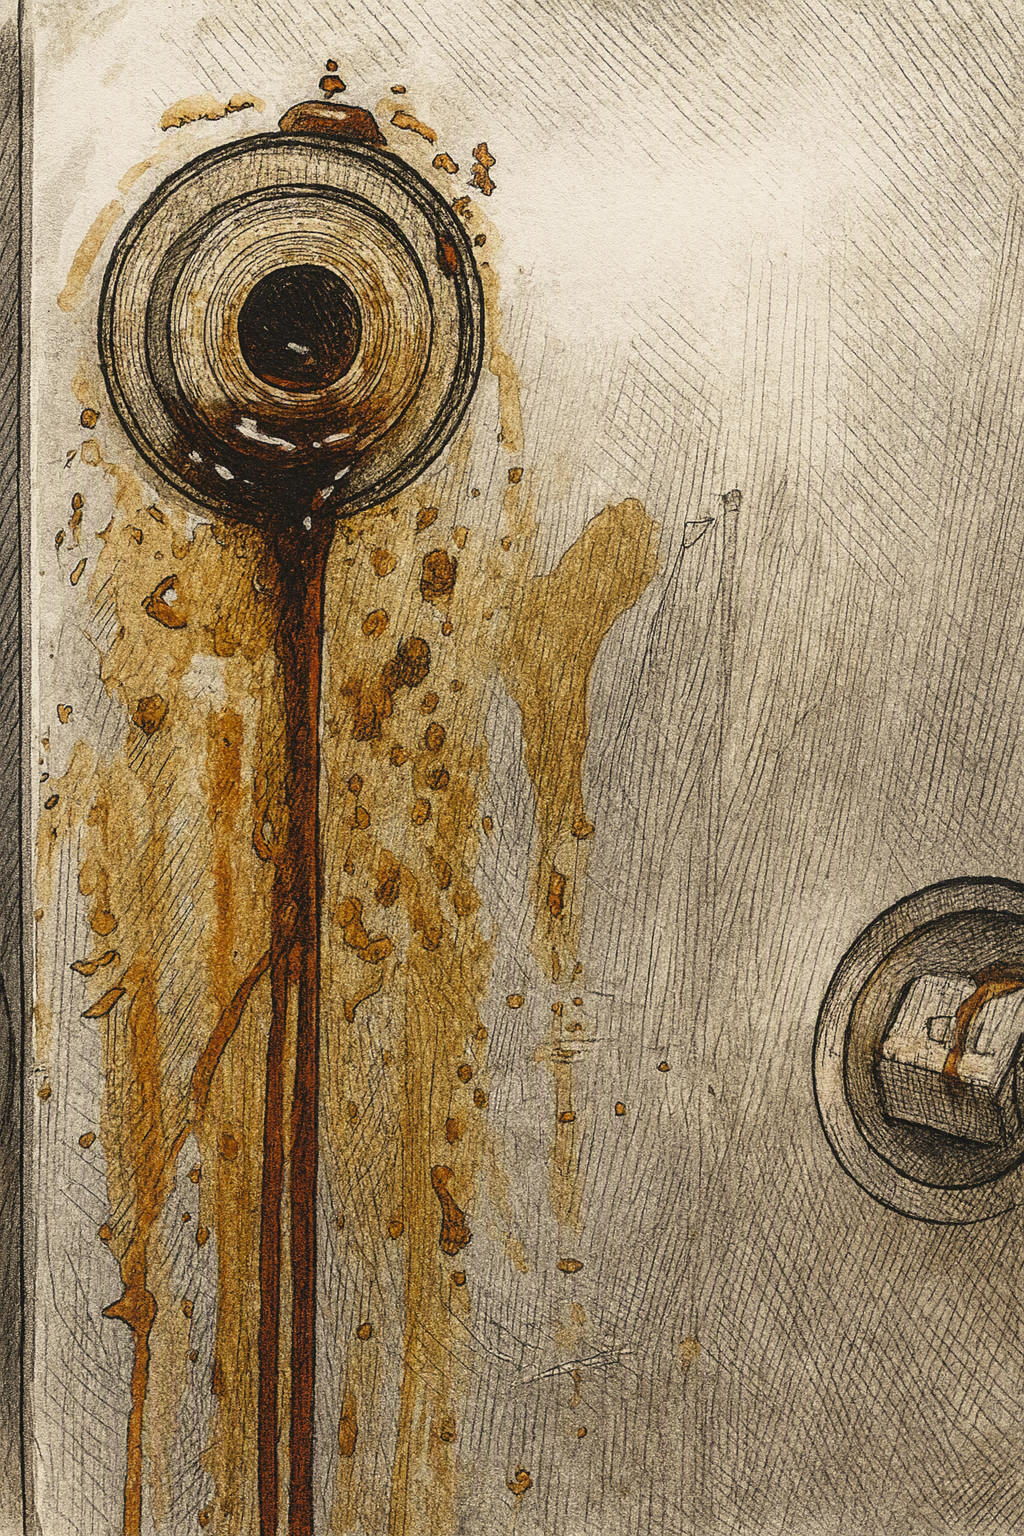
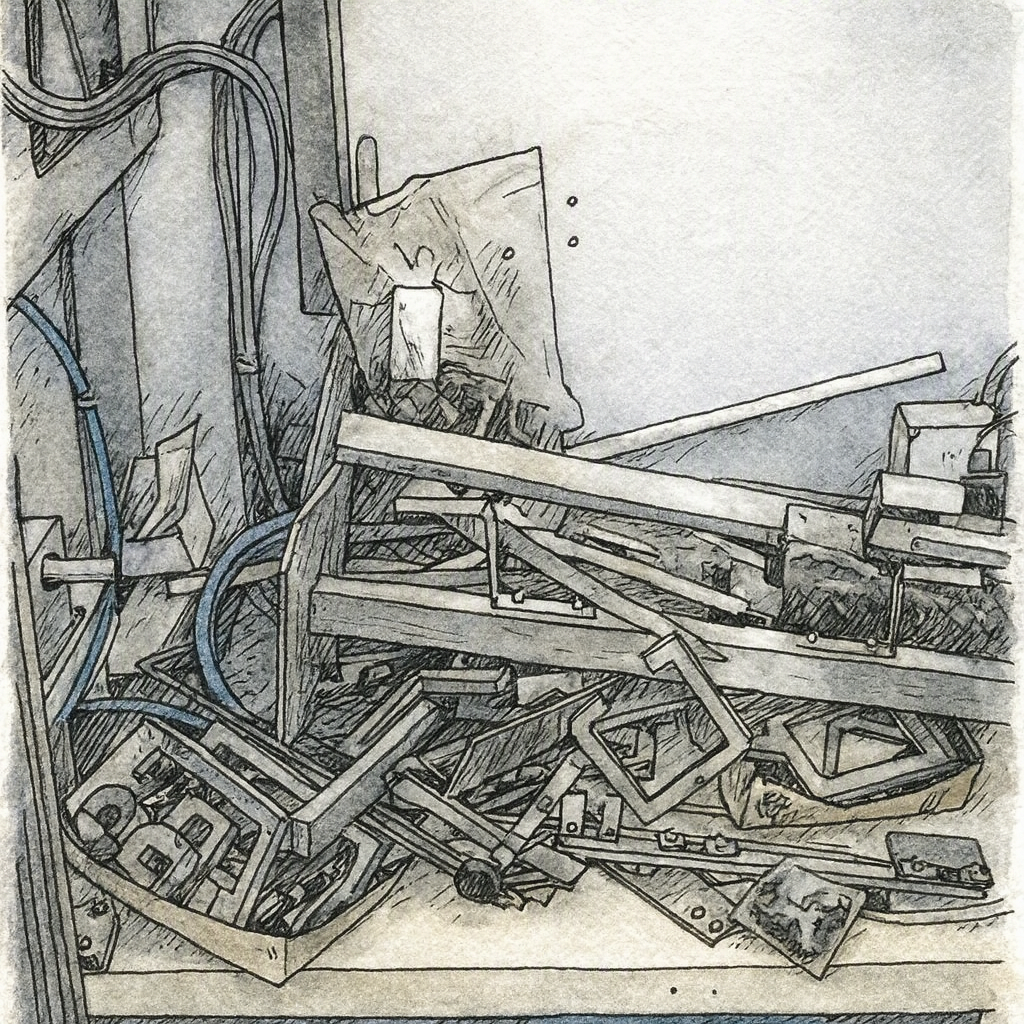
Defects found during initial cleaning are documented and tagged
What happens at each level
Tier 1 Prep | Daily
Before the Tier 1 meeting, the line leader walks each unit board. This is not a meeting, it is preparation for one. The line leader checks the defect count, the open tag count, the backlog trend, and whether every open tag has an owner and a close-out date. They arrive at the Tier 1 meeting already knowing the picture. The meeting is then a decision and escalation forum, not a data-gathering exercise.
Questions the line leader is asking at the board:
- Is the defect count moving in the right direction?
- Is the backlog growing, stable, or falling?
- Are all open tags assigned? Do they all have a close-out date?
- Is there anything here that needs to go up today?
Tier 1 — Line leader with the operating team | Daily
Review defects found and fixed since the last session. Confirm that every open tag has a named owner and a close-out date. Identify anything that cannot be closed at line level and escalate it today, not at the end of the week. Recognise the team for what they have found. Finding a defect is a success. A tag on the board is evidence that the system is working.
Key questions:
- What did we find since last session?
- What have we fixed?
- What is still open, and does it have an owner and a date?
- What do we need from the level above to close what we cannot close ourselves?
Tier 2 — Area or department leader | Daily
Review escalated items from all lines. Confirm that every escalated defect has a named owner and a realistic close-out date. Remove the barriers that are preventing the team from closing tags, parts, access, maintenance resource, engineering input. Monitor the backlog trend across lines. If one line's backlog is growing while others are stable, ask why. A growing backlog at one line is a signal, not a coincidence.
Key questions:
- What has been escalated from each line since yesterday?
- Does every escalated item have an owner and a date?
- What is blocking close-out, and what do I need to do to remove that block today?
- Is the backlog trend moving in the right direction across all lines?
Tier 3 — Site or function leader | Daily
Review overall backlog health and trend across the site. Identify recurring defect types or areas with persistent backlogs, these are systemic issues, not line-level problems. Make resourcing or prioritisation decisions that Tier 2 cannot make. Confirm that the system is functioning: that escalations are reaching Tier 2 and being acted on, and that the Defect Handling Hypercare is producing the expected reduction in minor stops over time.
Key questions:
- What is the overall backlog trend, and is it moving in the right direction?
- Are there defect types or areas that keep appearing? What is the systemic cause?
- Is Tier 2 getting what it needs to close escalations? If not, what decision do I need to make?
- Is the Defect Handling system producing the minor stops reduction we expect from AM Step 1?
The AM Step 1 process
AM Step 1 follows a defined sequence. Each stage builds on the one before it. The sequence is not arbitrary, it reflects the logic of what needs to happen and in what order.
Preparation
Preparation is not a formality. It is the stage that determines whether the rest of the step runs well or runs badly.
Train the team on the AM Step 1 process and supporting practices
Before the team touches the equipment, they need to understand three things: how abnormality handling works, what the cleaning standards are, and what the audit criteria are. These are not things to explain as you go. They are things to establish before you start, so the team knows what they are doing and why.
Prepare tools, forms, and supplies
The right cleaning materials, the right safety equipment, the right forms for recording abnormalities and findings, all of these need to be ready before the team begins. A team that has to stop and find a form, or improvise a cleaning tool, is a team that loses momentum and focus.
Capture before conditions
Before the first cleaning session, capture the current state of the equipment. Photographs, video, and baseline metrics. This is not optional. The before-and-after evidence is one of the most powerful tools the team has, for their own motivation, for demonstrating progress to leadership, and for the audit.
Safety activities
No cleaning begins until the safety activities are complete. This is not a procedural checkbox, it is a genuine assessment of the risks involved in getting close to equipment that may not have been properly inspected in years.
Conduct a risk assessment
Walk the equipment before the team begins. Identify every hazard associated with the cleaning activity, electrical, mechanical, chemical, thermal. Document the assessment. Ensure every team member has seen it. Identify lock out and tag out areas.
Confirm no emergency state work is in progress
Check that the equipment is in a safe state for the cleaning activity. Confirm that no emergency maintenance work is underway or pending that would affect the safety of the team.
Take countermeasures for unsafe conditions
If unsafe conditions are identified during the risk assessment, address them before cleaning begins. Do not work around them. Do not defer them. An unsafe condition found during preparation is a problem to be fixed, not a risk to be accepted.
Review MSDS for cleaning materials
Every cleaning material being used must have a current Material Safety Data Sheet reviewed by the team. This includes understanding the correct personal protective equipment, the correct disposal method, and the correct response if something goes wrong.
Integrate current safety plans for the area
The AM Step 1 safety activities do not replace the existing safety plans for the area, they build on them. Review what is already in place and ensure the AM Step 1 activities are consistent with it.
Review existing Job Safety Aids for the area
Check that the Job Safety Aids for the area are current, accessible, and understood by the team.
Clean to inspect
This is the core activity of AM Step 1. It is also the most commonly misunderstood one.
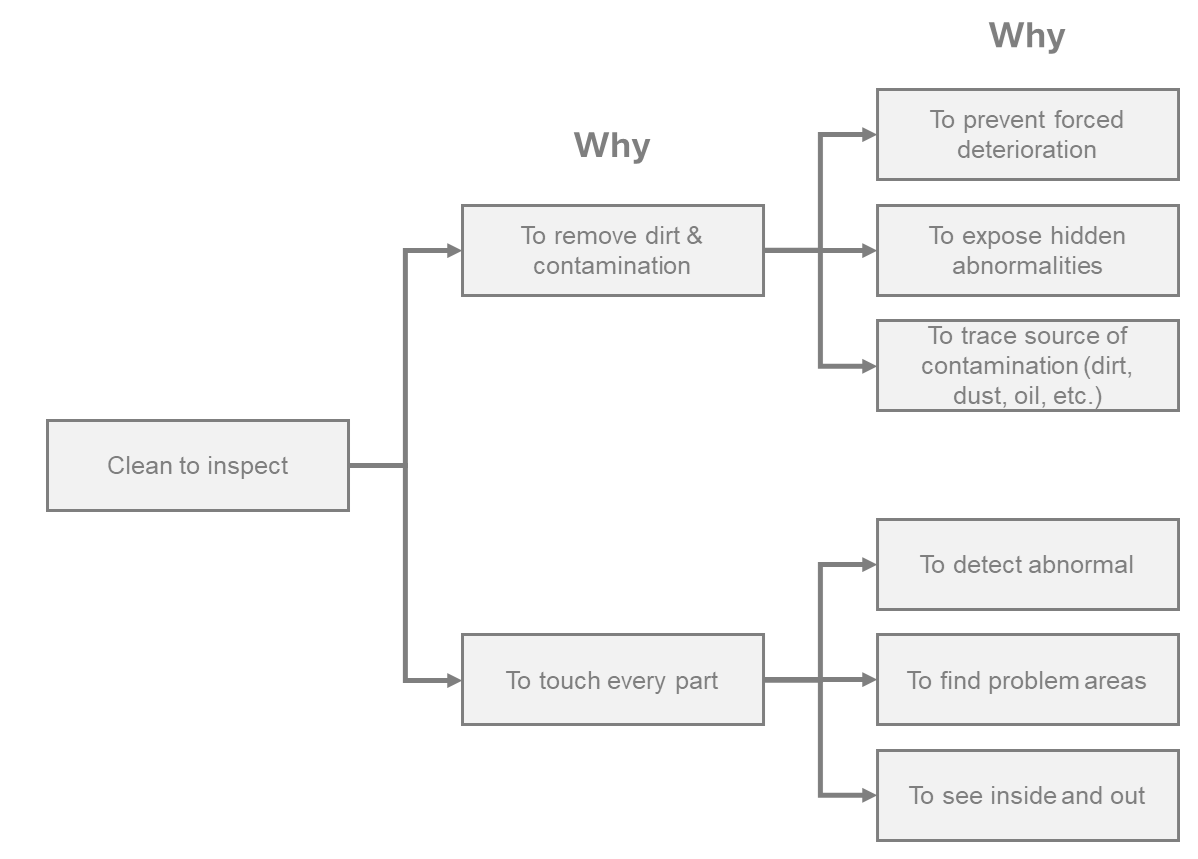
Cleaning to inspect is not the same as cleaning for cleanliness. The purpose is not a clean machine. The purpose is a team that has touched every part of the machine, seen what is there, and begun to understand what normal looks like.
The two tracks of cleaning to inspect
Cleaning to inspect works on two tracks simultaneously:
What the team is looking for
As the team cleans, they are asking questions about everything they touch:
- Is this over or under lubricated?
- Is the cap in place? Are all the screws in place? Are they the right ones?
- What level is the oil? What should it be?
- Is that gauge in the right range?
- Are we leaking oil? Where is it coming from?
- There is a lot of grease / dirt / debris here, where is it coming from?
These are not expert questions. They are the questions any attentive person asks when they look closely at something for the first time.
Review daily data for equipment problem areas
Before cleaning begins each session, review the data from the previous session. Which areas had the most abnormalities? Which areas are taking the most time? Use this to focus the team's attention where it is most needed.
Identify gaps in procedures
As the team cleans, they will find places where the current procedures do not reflect what actually happens, or where no procedure exists at all. Record these gaps. They will be addressed in the standards-setting stage.
Capture conditions
Before touching the machine take photographs of the current state. At the end of each cleaning session, capture the current state of the equipment. This is the evidence of progress, and the baseline for the next session.
Capture questions and learnings
Every question the team asks during cleaning is a learning opportunity. Record them. Some will be answered immediately. Some will require investigation. All of them are valuable.

Document findings
The documentation stage is where the team's observations start to become a system.
Tag defects and link them clearly
Every abnormality found during cleaning is tagged immediately. The tag identifies the location, the type of abnormality, and the date it was found. Tags are not removed until the defect is corrected and the correction is verified. If tags are not allowed in your area, hold them against the defect and take a photo, print in your AM area and only remove it when the defect is fixed.
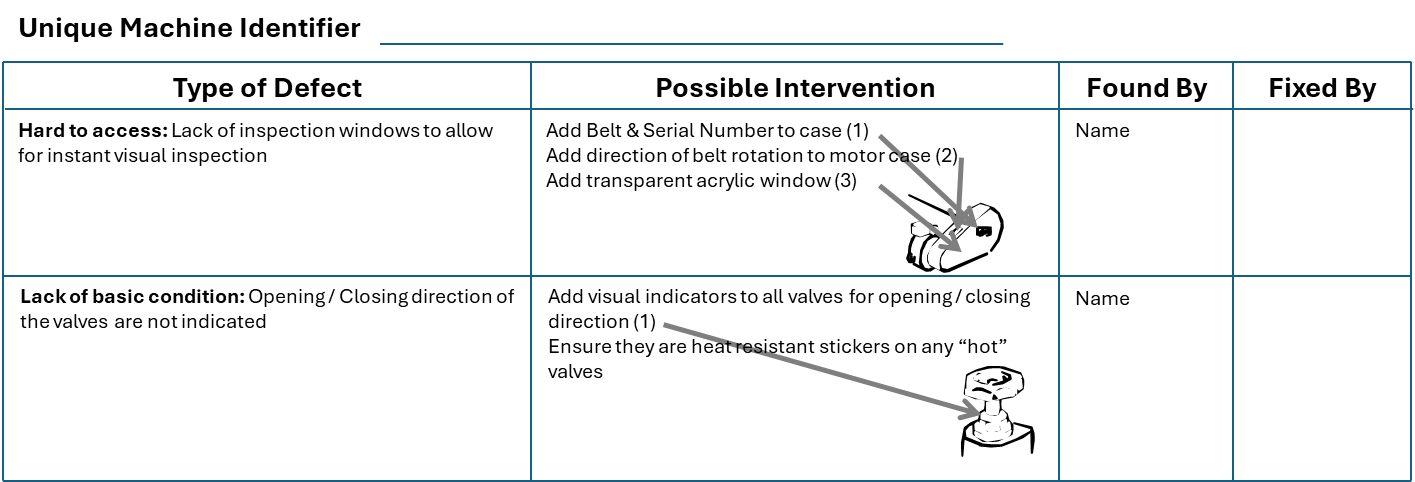
Defects are categorised into three types at the point of tagging:
- Abnormality. A defect or deviation from the expected condition that needs to be corrected
- Hard to access. A location that is difficult to clean, inspect, or maintain, and that needs to be improved
- Source of contamination. A location or condition that is generating the dirt, dust, or contamination that is causing problems elsewhere
Each category has a different path. Abnormalities go to the correction stage. Hard-to-access areas and sources of contamination become problem areas for AM Step 2.
Record inspection findings
Every finding is recorded in the abnormality log. The record includes: the unique machine identifier, the type of abnormality, the possible intervention, who found it, and who fixed it. This is not a bureaucratic exercise, it is the data that drives the Tiered Accountability Meeting and the improvement tracking system.
Record questions and learnings
Every question the team asks, and every answer they find, is recorded. These become the raw material for One Point Lessons.
Develop One Point Lessons and train the team
As findings are recorded and questions are answered, the team develops One Point Lessons. A One Point Lesson is a short, visual, single-topic document, typically one page, that captures one piece of knowledge in a form that can be used to train others quickly. The number developed and the number of people trained on each one are both tracked. A useful addition to a One Point Lesson is explaining why this lesson is important, what defect if mitigates or you should be looking for.
Update role descriptions
As the team develops a clearer understanding of the equipment and what it needs, the role descriptions for the operating team are updated to reflect the new responsibilities. This is how the Technical Operator model is formalised, not through a policy document, but through the progressive documentation of what the team is actually doing.
Update the Line Activity Board
The Line Activity Board is the team's daily management tool. It shows the current status of abnormalities, improvements, and results. It is updated after every session. It is the first thing the team looks at at the start of each shift, and the last thing they update before they leave.
Correct defects
Not every defect found in AM Step 1 can be fixed immediately. But every defect must be addressed, either corrected, assigned, or escalated. The team does not leave defects unresolved.
Fix defects
The team corrects what they can correct themselves. This includes:
- Minor defects. Loose bolts, missing caps, worn seals, small leaks, damaged guards. These are within the team's capability to fix and should be fixed immediately.
- Safety defects. Any condition that creates a safety risk. These are fixed before the next session begins, without exception.
- Lack of basic conditions and unnecessary items. Equipment that is not in its designed state, and items that do not belong on or near the equipment. Remove them.
Escalate what the team cannot fix
Abnormalities that require maintenance expertise, engineering input, or significant resources are escalated through the Tiered Accountability Meeting. They are assigned an owner and a close-out date. They are tracked until they are closed. The team does not accept "we'll get to it" as an answer.
Stabilise operating settings and procedures
Where settings have drifted from their correct values, bring them back. Where procedures do not reflect what the team is actually doing, update them. The goal is a stable, documented baseline, not a perfect one, but a known one.
Organise the work area, tools, and supplies
A clean, organised work area is not an aesthetic preference, it is a functional requirement. Tools that are in the right place are tools that get used. Supplies that are correctly stored are supplies that are safe and accessible.
Develop OPLs and train others to find and fix
As the team corrects abnormalities, they develop One Point Lessons that capture the "find" and the "fix", what to look for, and what to do when you find it. These are used to train other team members, so the knowledge is not held by one person.
Conduct targeted improvements
Targeted improvements are the team's focused effort on a specific loss area. They are not random, they are selected based on the findings from the cleaning and inspection activities, and they are aimed at accelerating the improvement of a specific aspect of equipment performance.
Identify the improvement theme
Based on all the findings to date, the team selects one improvement theme, one area where focused effort will have the greatest impact. This might be a specific source of contamination, a recurring type of abnormality, or a loss category that the data shows is significant.
Identify resource requirements
Some improvements are within the team's capability. Others require support from maintenance, engineering, or other functions. Identify what is needed and escalate through the Tiered Accountability Meeting to get it.
Make improvements as a team
Improvements are made together. Every team member contributes. The results are documented, and the One Point Lessons are updated to reflect what was learned.
Create initial standards
Before the AM Step 1 audit, the team creates the initial standards that will maintain the work done during the step. These are not the final CIL standards, those are developed in AM Step 3. These are the interim standards that keep the equipment in the condition the team has worked to achieve.
Capture the current best approach
Document the current best approach for operating procedures, process settings, and the cleaning approach. This is not a theoretical document, it reflects what the team has actually learned during AM Step 1.
Create cleaning standards
Develop standards for the cleaning activities that will maintain AM Step 1 conditions. The standard specifies: what is cleaned, the method, the frequency, the time required, and who is responsible. Train the team on the standard.
Capture baseline results
Record the baseline results for all process and output measures. This is the starting point for AM Step 2, the documented evidence of where the team is at the end of AM Step 1.
Track results
Results are tracked daily. Not weekly. Not at the end of the step. Daily.
Monitor and trend daily results
The team reviews the data from the previous session at the start of each new session. What losses occurred that should have been prevented? What defects were found? What was fixed? What is still open?
Track process and output measures
Both types of measures are tracked, the process measures (defects found, OPLs developed, improvements made) and the output measures (minor stops, cleaning time, abnormalities fixed). The process measures tell you whether the team is doing the right things. The output measures tell you whether those things are working.
Identify gaps and take appropriate actions
Where the results are not moving in the right direction, the team identifies why and adjusts. This is not a blame exercise, it is a problem-solving exercise. The Tiered Accountability Meeting is the forum for escalating gaps that the team cannot resolve themselves.
Behaviours
AM Step 1 produces a specific set of behaviours in the team. These are not aspirational, they are observable. If you walk the line during AM Step 1 and you do not see these behaviours, the step is not running correctly.
What good looks like in the team
- People identify and record abnormalities as they find them, not at the end of the shift, not when they remember, but immediately.
- People do not allow contamination to accumulate. When they see it, they address it or record it.
- People want to develop a deeper understanding of "normal." They ask questions. They investigate. They are curious.
- Team members take on individual responsibilities. They own their section of the equipment.
- People record their findings and learnings and share them with the rest of the team.
- Teams set priorities for cleaning based on what the data tells them, not based on habit or convenience.
What good looks like in leadership
- Teach what the ideal condition looks like. Show the team what they are working toward, not just what they are working on.
- Show normal versus abnormal, and recognise the team when they identify it correctly. Finding an abnormality is a success, not a problem.
- Teach that cleaning is inspection. Reinforce this every session. The team will default to thinking of it as housekeeping unless the leader consistently reframes it.
- Show how corrections to different types of abnormal situations are expected to be handled. The team needs to see the standard, not just hear about it.
- Coach people on selecting improvements. The improvement theme is not chosen by the leader, it is chosen by the team, with the leader's guidance.
- Build a plan, track activities regularly with the team, and adjust. AM Step 1 is not a one-off event, it is a sustained activity that requires active management.
- Check that all types of abnormalities are being found. If the team is only finding one type, they are not looking broadly enough.
- Make sure the abnormality tracking system is working and that the backlog is not growing faster than it is being closed.
- Balance the need for cleaning with time for running. AM Step 1 happens alongside production, not instead of it.
- Check that everyone is participating. AM Step 1 is a team activity. If some people are watching while others work, the team development objective is not being met.
- Use the process health check to focus the team and ensure AM Step 1 is complete before moving on.
AM Step 1 audit
The AM Step 1 audit is a formal confirmation that the expected capability has been achieved. It is not a surprise inspection, the team has known the criteria since the preparation stage. It is the moment where the team's work is recognised and their readiness to move to AM Step 2 is confirmed.
The audit is requested by the team and conducted by a qualified assessor, typically the AM pillar leader or an external facilitator. It is done with the team present. It covers both the equipment condition and the team's capability.
What the audit checks
Equipment condition
- The equipment is clean and free of accumulated contamination.
- All identified abnormalities have been tagged, recorded, and either corrected or assigned with a close-out date.
- Basic conditions are established: all bolts and connectors tightened and in place, no unnecessary items on or near the equipment, no unsafe conditions. These are the minimum. The team is not trying to make the equipment better than it was designed to be, they are trying to get it back to the condition it was designed to run in
- Before-and-after photographic evidence is documented and accessible.
- Problem areas have been identified and recorded.
Team capability
- Team members can identify abnormality types and give examples of each from their own equipment.
- Team members can explain the difference between an abnormality, a hard-to-access area, and a source of contamination.
- Team members can demonstrate the cleaning-to-inspect approach, not just the physical activity, but the thinking behind it.
- One Point Lessons have been developed and the team has been trained on them.
- The abnormality handling process is understood and being used correctly.
- The Line Activity Board is current and the team can explain what it shows.
Systems and standards
- The abnormality log is complete and up to date.
- The initial cleaning standards have been documented and the team has been trained on them.
- Baseline results for all process and output measures have been captured.
- The improvement tracking system is in use and the team can demonstrate their improvement per person.
- The Tiered Accountability Meeting is operating and abnormalities are being escalated and closed through it.
If the audit passes:
Celebrate the success. This is a genuine achievement, the team has done something that most operating teams have never done. Recognise it publicly. Then begin AM Step 2 preparation.
If the audit does not pass:
The audit identifies the specific gaps. The team develops countermeasures for each gap and implements them. When the countermeasures are closed, the audit is repeated. There is no fixed timeline for the re-audit, it happens when the gaps are genuinely addressed, not when a calendar date arrives.
A failed audit is not a failure of the team. It is information. It tells the team and the leader exactly what still needs to be done. The discipline is in addressing it properly, not in moving on before it is ready.
What next?
AM Step 1 establishes the baseline. The equipment is in a known condition. The team understands what they are looking at. The abnormality handling system is working. The initial standards are in place.
AM Step 2 builds on that baseline by addressing the root cause of problems the team identified in AM Step 1, makes the equipment easier to maintain, and defects easier to see.