Process Improvement Process
The five-step discipline for defining, observing, redesigning, and standardising a work process. This guide covers every step in detail, the fields, the tools, the decision logic, and the sustainment checklist.
Getting to the right method before you try to improve it.
How can you improve a process you have never properly defined? How can you hold a standard nobody has written down? How can you close a gap you have not measured?
This guide walks through Process Improvement (PI) in sequence. It is not a form to fill in. It is a discipline, a way of earning the right to have an opinion about a process before you change it.
Work through the steps in order. Do not skip ahead. The improved standard at the end of Step 5 is only useful if it looks meaningfully different from the one you wrote in Step 1. If it looks the same, you have not looked hard enough.
Define your process
Fill in what you know now, before you observe anything. Some fields will be incomplete at this stage, that is expected. Complete the rest as the improvement progresses. By the end of Step 5, every field should have an answer.
Step 1 — Preparation
The gap between what the customer expects and what the process is actually delivering is your problem statement. Write it as explicitly as you can. Everything from Step 2 onwards is the work of closing it.
Define the process
- Name
- Type — Physical (e.g. changeover, cleaning, maintenance) / Transactional (e.g. approval, scheduling, reporting)
- Description — What this process does, from start to finish. One or two sentences.
- Scope — Which area, which lines, what site, what function
Clarify the roles
- Owner — Name and role of the single person accountable for this standard. One person. Not a team.
- Department / Line / Team / Function — The organisational home of this process
- Users — The roles that execute this process or part of this process (e.g. operators, technicians, planners)
- Customer — Who receives the output of this process and what they need from it
- Facilitator — The person who will run the improvement work. For follow-up and reapplication.
Understand the process boundaries
- Input(s) — What must be in place before this process can start. Materials, information, conditions.
- Trigger — The precise first step. When and how does this process begin?
- End Point — The precise last step. When is this process complete?
- Output(s) — What this process produces. The tangible result.
Document the important measures
In-process measures tell you whether the process is running correctly while it is happening. They are leading indicators, things you can act on before the output is affected.
Output measures tell you whether the process delivered what it should. They are the result.
For each measure we should document the name, the description, the standard or target condition, the trigger for escalation, the trigger for action, the frequency we track this measure, and who tracks it.
The current management system
- Upstream Processes — What feeds this process
- Downstream Processes — What this process feeds
- Management Systems — Where this standard is checked, tracked, and escalated (aggregated)
- Supporting Documentation — Related standards, work instructions, specifications, or guides this process depends on
The Gap
This is important. It is the problem statement. It defines the gap between what the customer expects and what the process is actually delivering. Everything from Step 2 onwards is the work of closing this gap.
If you are unsure of your specific problem statement see the Problem Definition guide.
Next you must validate your problem statement with the customer of the process. Ensure they are aligned with the vision of success and can easily articulate why this is important to their line / area / site.
At the end of Step 1 you have a defined process and a written gap statement. That gap is your problem statement. Move to Step 2.
Step 2 — Restore the Process
Before you redesign anything, confirm that the process is understood and being followed as intended.
Many problems are not caused by a bad process, but lack of adherence to the standards. They are also caused by no process, or by conflicting processes. Trying to improve a process that is not being followed is a waste of effort. Trying to improve a process that does not exist is impossible.
Work through this logic before you go further:
Is there a standard?
- If not: create a "current best-known" standard from what is actually happening.
- If not sure: go and check. Look at the actual work, not the system.
Is the standard being followed?
- If not: find out why. Remove the barriers, missing tools, unclear steps, training gaps, access issues.
- If yes: continue.
Is there still a loss?
- If yes: the standard exists and is being followed, but it is not good enough. Proceed to Step 3.
- If no: put in place the three things that hold a standard (see Step 5). Go to Step 5.
At the end of this step you have a stable, understood baseline. You know what kind of problem you have before you try to solve it.
Step 3 — Understand the Current State
You cannot understand a process from a desk. Go to where the work is done. Watch it run. Map what actually happens, not what the procedure says, not what people remember, but what you can see.
This step has one job: produce an accurate map of the current state. Everything in Step 4 depends on it.
Follow the thing.
Start with the product, the part, the document, or the information, whatever moves through the process. Follow it from the trigger point to the end point defined in Step 1. Note every step it goes through, every place it waits, every time it is touched, moved, or checked.
Follow the people.
Watch who does what, in what order, and where they are positioned. Note where people travel, where they search, where they wait for each other, and where the sequence breaks down. Two people doing the same task differently is a finding. One person doing a task that nobody else knows about is a finding.
Use the right tool for the process type.
The map is not the point. Understanding is the point. Use the simplest tool that gives you an accurate picture.
For physical processes, changeovers, cleaning, maintenance, assembly:
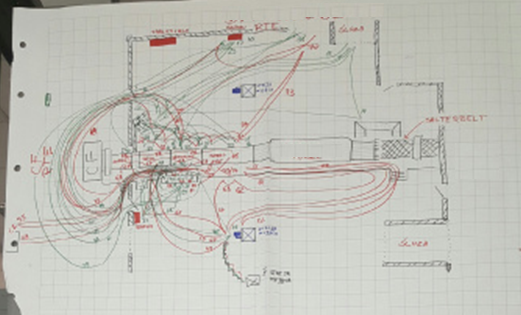
Travel and Material Diagram
Draw the physical layout of the work area. Show where people start, where they travel, and where materials and tools are located. Trace the movement of the product and the people on the same diagram. Distance and direction matter. A diagram that shows people crossing paths or travelling to the same location twice is already telling you something.
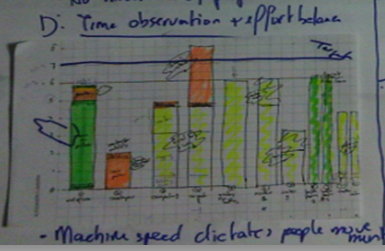
Time Observation Sheet
Record every task in sequence with start and stop times. Note who does each task and where. Capture delays, interruptions, and waiting. Mark the total elapsed time from the trigger point to the end point. Do not average across multiple runs at this stage, capture one complete instance accurately.
For transactional processes, approvals, scheduling, reporting, order processing:
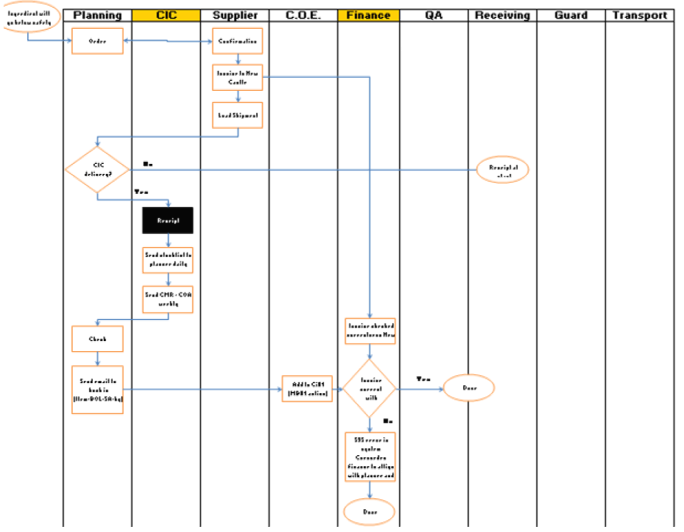
Swim Lane Diagram
One lane per role or function. Show every step, decision, and handoff in sequence. Mark where work waits, where it loops back, and where the same information is entered or checked more than once. Draw it on paper or on a wall. The method matters more than the tool.
At the end of this step you have an accurate map of the current state. You know what the process actually looks like, who does what, and where the time goes. Move to Step 4.
Step 4 — Identify and Implement Improvements
Identify Opportunities:
Look at your map through the lens of the 8 Wastes. Most of the time lost in a process is not in the core work, it is in the waste around it. Naming the waste before you redesign anything keeps the team focused on what actually matters.
The 8 Wastes:
- Transport: Moving materials, products, or information further than necessary
- Inventory: More work in progress, materials, or information than the process needs right now
- Motion: People moving or reaching more than required
- Waiting: People, equipment or processes idle while waiting for the next step, approval, or input
- Overproduction: Producing more than the customer needs, sooner than they need it
- Overprocessing: Doing more work, checking, or reporting than the customer requires
- Defects: Errors, rework, corrections, or failures that require effort to fix
- Skills: Not using the knowledge, experience, or capability of the people doing the work
For each waste you identify, note where it appears on your map and roughly how much time or effort it represents.
Implement Select Improvements
Starting with your process map and identified opportunities, redesign your process to eliminate or reduce as much as possible.
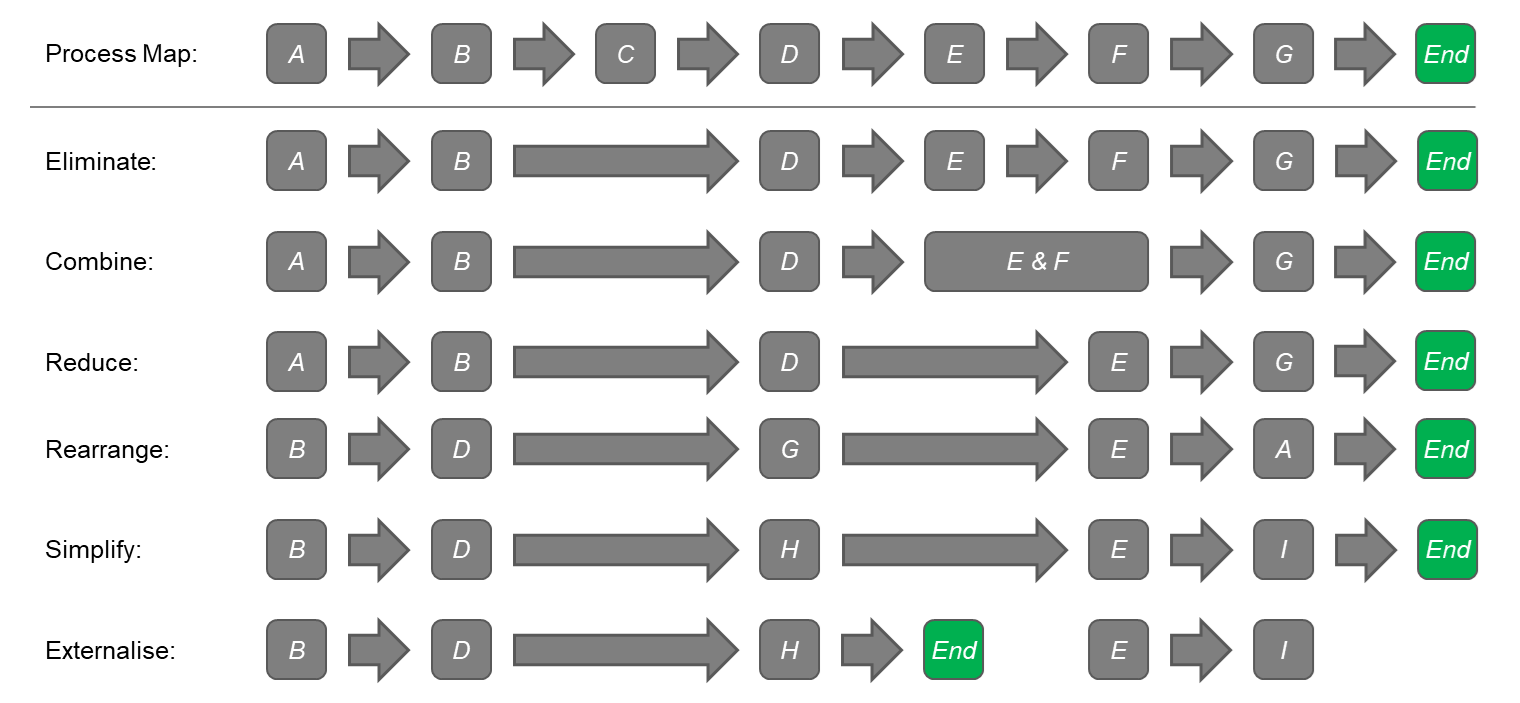
ECRRSE:
- Eliminate: Remove steps that add no value
- Combine: Merge steps that are unnecessarily separate
- Re-arrange: Change the sequence to reduce waiting or travel
- Reduce: Reduce the frequency, quantity, or complexity of a step
- Simplify: Make remaining steps easier and less error-prone
- Externalise: Consider doing the work before or after the process trigger or end point
Work through ECRRSE in order. Eliminate before you simplify. Do not simplify a step that should not exist.
Trial changes at the process:
- Test changes immediately where it is safe to do so.
- Re-time or re-measure after each change.
- Capture any quality or safety risks and put controls in place.
- Document what changed and why.
At the end of Step 4 you have an improved method, proven by re-timing or re-measurement, and a short list of any remaining constraints.
Step 5 — Standardise and Reapply
This is where the improvement becomes the way we run.
A standard that is not documented is not a standard. It is a habit. Habits belong to the person who has them. Standards belong to the process.
Complete the process standard document using the fields in Part A. Every field in Part A should now have an answer. If any field is still blank, the PI is not complete.
Standard work — minimum content:
- Process name, owner, revision number, and date.
- Scope: where and when this standard applies.
- Step-by-step method: who does what, in what order, with what tools.
- Key checks and acceptance criteria at critical points.
- What "ready to start" looks like: inputs, conditions, materials, tools.
- What "done" looks like: outputs, checks, sign-off.
- For physical processes: internal vs. external task list, kitting list, point-of-use locations.
- In-process and output measures, with targets and trigger limits.
Sustainability of your Process
Three things must be in place for a standard to hold. Remove any one of them and the standard will drift.
Once the standard is in place, it is maintained through your governance processes, Leaders Standard Work, Tiered Accountability Meetings, etc. Those system defines who checks the standard, how often, what they look for, and how they respond when something is wrong. Without this your improvements are unlikely to stick long term.
Reapplication
- Identify similar processes where the same improvement applies.
- Define what is common (can be standardised) and what is genuinely different (must be adapted).
- Share the learning. The next improvement should be faster than the last.
What this gives you
By the end of Step 5 you have two things.
When to go around again
The process is not always linear. Sometimes the improved standard at the end of Step 5 is not the answer. It is a better question.
If your investigation has narrowed the problem significantly but has not yet confirmed the mechanism, take your Step 5 output and make it your new Step 1. Run the process again, at higher resolution, on the smaller problem.
You will know it is time to go around again when:
- The improved standard is more specific than the initial one, but still describes a symptom rather than a mechanism.
- Step 2 eliminated several variables but left one or two open that the observation in Step 3 did not resolve.
- The fix that seems obvious has been tried before and did not hold.
Each pass narrows the problem. Each improved standard is more specific than the one before it. You stop when the mechanism is confirmed and the fix is clear.
Common pitfalls
Leadership behaviours
- Go and see. Do not rely on memory, reports, or what people think is happening. Observe the actual work.
- Total employee involvement. The people who do the work know the most about it. Involve them from Step 1.
- One standard. The output of a PI is one agreed method, not a range of acceptable approaches.
- Ownership. Every standard needs a named owner. Without ownership, standards drift.
Key Links
This guide is the how-to for the Process Improvement pillar.
When a process is not being followed, Problem Solving finds the cause. Process Improvement changes the standard.
If the gap in Step 1 is unclear, the Problem Definition guide will help you write a specific, measurable problem statement before you begin.
5S is the method for eliminating workplace losses, Waiting, Inventory, Motion, and Transport, that the Process Improvement discipline is designed to address.
Process Confirmation is how the improved standard is held in place after the PI closes.